Leslie Gabriel

The basics, on setting-up the Corsair 880 trimaran

Is the Corsair 880 trimaran right for you?

Corsair 880 trimaran

Here’s some information on what it takes to get the Corsair 880 ready to sail.

Follow Tula’s Endless Summer. Billy and Sierra are a couple of highly energetic, passionate adventurers who toured around the country with the new Corsair 880 — putting the Corsair 880 through the paces. They had the boat for five months. Tune in and follow these guys for a bit of knowledge and entertainment.

Below is a video that goes into much more detail on the Corsair 880. Check it out!
”The basics on setting-up the Corsair 880 trimaran.”

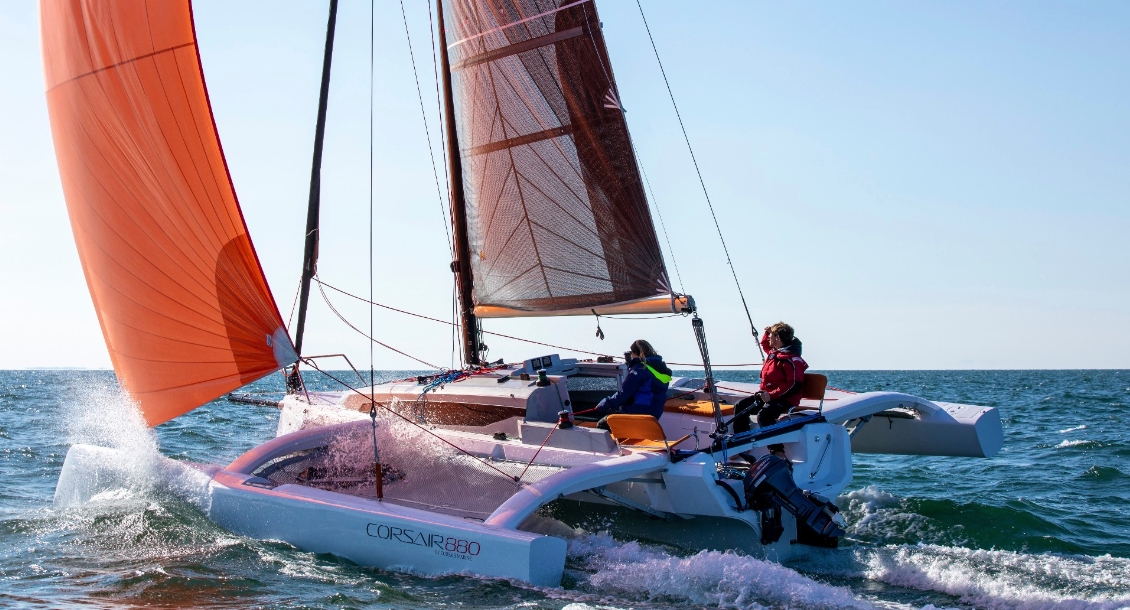
The Corsair 880 trimaran is designed to be completely safe and comfortable, for people of all skill levels. It features creature comforts such as air conditioning, heating, refrigerators and more. In true Corsair fashion, the generator and air conditioning are removable to reduce excess weight when racing, or reduce trailer weight when on the road. And this is where the Corsair 880 trimaran is the revolutionary boat it promises - all of that comes in a folding, trailerable package well below the trailering weight limit of most passenger cars.

Relaxed cruising: Helming from the protection and comfort of the padded cockpit seats is made possible due to the low heel and stable sailing provided by high volume ama design and a huge unfolded beam.

High speed racing: A 44-foot carbon rig, laminate sails offered on the Corsair SPORT model, combined with the impressive low-rocker hull design deliver class leading performance.


If you're interested in knowing more about the Corsair 880 or the Corsair 880 Sport, we’d love to hear from you.

180 Marine is the leading dealer in the U.S. for Corsair trimarans.

Richard Allen, the Corsair Trimaran Expert

Repair on a Farrier trimaran

This was not written for a Corsair trimaran but we think you’ll
find it very helpful information. Enjoy.


Article by Don Gutzmer-GBI Technical Advisor

I received a call from a friend of mine who owns a 2004 Farrier F33RX folding trimaran, the 33′ Nelda Ray. This sailboat is a frequent competitor in regattas on the Great Lakes. The aluminum mast step was compressing the deck and causing laminate failure. I told my friend I’d figure out what went wrong and then fix it so it would never happen again. I’ll outline the process I used to make this successful repair.

Before I started the repair, I covered the boat inside and out with a layer of 5-mil plastic sheeting in order to keep things clean. I left exposed only the areas that needed surface preparation. I used painter’s tape to seal the plastic film along the edges. Working as neatly and cleanly as possible helps me to manage my time and make repairs efficiently.

The first step in this repair was to find out why the laminate had been compressed to the point of failure. To investigate, I removed the aluminum mast brackets from the mast step and examined how the deck was constructed. Using a router with a plunge tip bit cutter, I removed a portion of the deck but left the inner fiberglass skin intact. This made the problem easy to see: the laminate damage occurred because the load was too great for the core.

The deck had been fabricated with a few layers of lightweight fiberglass over high-density foam core, with minimal layers of fiberglass inside of the hull. The high loads from the mast bearing down on the aluminum mast step had compressed the foam core, leading to fatigue damage over the years.

I devised a two-part repair plan that would prevent this failure from reoccurring. The first part required increasing the compression strength of the core. The second part was to strengthen the supporting structure to redistribute loads to the hull.

I began the first phase of the repair by bonding a 5/8″-thick Garolite® G-10 panel (approximately the size I’d removed with the router) in place of the high-density foam core. G-10 is a high-pressure fiberglass laminate that’s manufactured by stacking multiple layers of glass cloth, soaking them in epoxy, and compressing them under heat until the epoxy cures. You might ask “Why use G-10 Garolite® when you could make a fiberglass panel with WEST SYSTEM® Epoxy?” One reason is that I had a time constraint so it was more efficient to order a prefabricated panel. G-10 offered all the attributes I needed for the application, including excellent mechanical properties.

To prevent stress concentrations on the 90-degree angles, I rounded the corners of the G-10 panel and sanded them with 80-grit to prepare for epoxy. For bonding the G-10, I chose Six10® Thickened Epoxy Adhesive because of its gel consistency and toughness when cured. The Six10® was applied to the bottom of the G-10 panel to adhere to the inner fiberglass laminate.

After the Six10® cured, I used a grinder to taper a 12:1 bevel around the perimeter of the outer fiberglass skin on the deck. In order to replace the damaged laminate, I cut five patches of 1708 biaxial fiberglass cloth in graduating sizes. I used WEST SYSTEM® 105 Resin and 206 Slow Hardener® to apply these patches. I made each fiberglass patch ½” smaller in all directions. I wet out the patches with epoxy and applied the largest patch first, followed by four consecutively smaller patches to match the original thickness. I then applied 2-3 fill coats of epoxy.

After the epoxy cured, I sanded the surface smooth with 80-grit. Next, I mixed a fairing compound consisting of WEST SYSTEM® 105/206 thickened with 407 Low-Density filler. Using a plastic spreader, I applied the fairing compound and filled in any low spots. When it cured, I sanded it with 220-grit to prepare for primer. To match the original gray paint on the deck, I carefully mixed black and white paint to reach the correct shade of gray.

Phase two was to reinforce the inside of the hull to redistribute the loads from the aluminum mast brackets. To do this, I would need four more pieces of G-10. Two panels would attach to the underside of the deck on each side of the daggerboard case and the others would adhere vertically to the daggerboard case. Then the panels would be covered with multiple layers of fiberglass cloth.

To prepare the G-10 panels, I ground a taper on one side of all four pieces to minimize stress concentration and allow the fiberglass to transition smoothly onto underside of the deck and the daggerboard case. Using an orbital sander with 80-grit, I also removed the paint from the underside of the deck and the daggerboard case where I planned to bond the G-10 panels.

With Six10 Adhesive, I epoxied a G-10 panel to the underside of the deck on each side of the daggerboard case. I positioned wooden prop sticks to help hold the panels in place until the epoxy cured. The other panels were butted underneath to better transfer the loads from the deck into the daggerboard case. Once that cured, I used Six10 to create a fillet where the two panels butted together.

The final step was applying four layers of 1708 Biaxial Cloth over the panels. Applying witness marks to the fabric with a felt tip pen helped me place it exactly where it belonged. After fairing the surface with epoxy thickened with low-density fillers, I sanded it smooth and painted it with a flat white paint.

Over a three-week period, there were many starts and stops to complete this project. My friend had a tight deadline for an upcoming race. Working evenings to meet the deadline, it took me about 45 hours to complete these repairs. My friend was very happy with the finished repair and said it looked great. He also mentioned, with the aluminum mast step repaired, he could now put on enough tension to properly tune the rig (which he was not able to do before, due to the damage.)

Following my repair, Team Nelda Ray successfully competed with 93 other boats in the 34th Harvest Moon Regatta. This 150-mile race goes from Galveston to Port Aransas, Texas. Nelda Ray’s crew took line honors and was awarded the Mayor’s Trophy. They went on to take 1st place in the Multihull Gold Division of the 53rd Wurstfest Regatta hosted by the Canyon Lake Yacht Club in Texas.

Read this entire article >>

Other informative articles:

Mast lowering on a Corsair 880 Sport >>

Multihulls are getting to the age where they are deemed worthy of restoration! >>

The folding system on a Corsair trimaran takes only minutes >>

Corsair 880 Frequently Asked Questions >>

Mast lowering on the Corsair 880 Sport

There are many stages to follow when recovering your 880 and lowering the mast.

We hope you’ll find this information helpful, be very careful and ask for expert assistance!

Corsair 880

Retrieving the boat

Whenever possible align the trailer in the direction of the wind to make it easier to motor onto the trailer when the daggerboard and centerboard are raised.

Corsair 880

Tie down tips

Use soft dock lines and padding, loop around the trailer frame and use the winches. smaller diameter line is not a great idea, more likely to rub and cause damage.

Corsair 880

Tie down tips

Use the 880 ladder or a 6-foot ladder to continue tie down tasks. Be sure to secure the bow to the trailer and the trailer to your vehicle so it doesn’t tip with added weight in the stern.

Motor tips

Use the motor support to take pressure off the tilt mechanisms. The road is much harder than water.

Corsair 880

Mast support

Be sure to use all supplied mast support lines as instructed and secure the bitter end.

Corsair 880

Mast drop preparation - be a pro

Look at the big picture…take your time. What will save time? What will cause problems? Get a good process and follow the steps the same way every time to become an expert.

Corsair 880

Teamwork pays

When possible use one or two crew on the ground and one person stays on the deck working in concert to confirm each other’s tasks and steps

Corsair 880

Prepare the halyards

Use TWO halyards, the jib and screecher halyard in tandem, to become your temporary forestay to lower the mast.

Corsair 880

Limit failure points

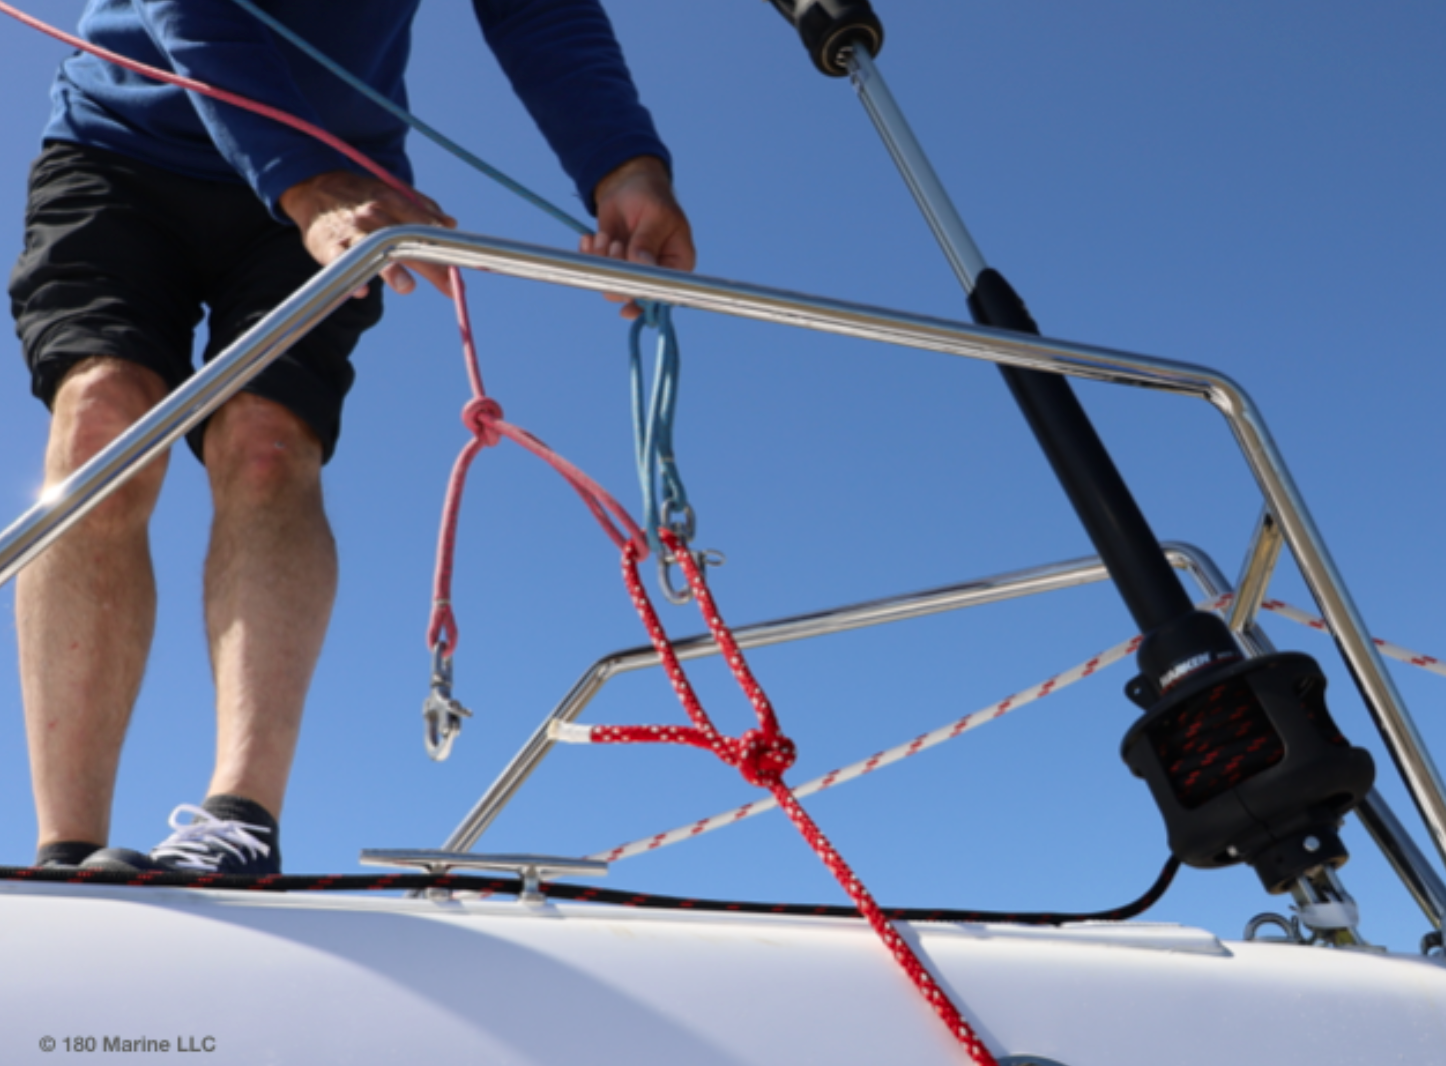
Tie a bowline in each of the halyards as the attachment point. Avoid using the halyard termination hardware to eliminate one potential failure point.

Corsair 880

Prepare the trailer winch

Your 880 is equipped with a custom winch fitted with a clutch. You must actively wind or unwind

the line to use it safely for your mast lowering.

Corsair 880 Sport

Connect the halyards

Finish the connection by tying another bowline in the winch line to connect to your two halyards.

Corsair 880 Sport

Clear the mast in stages

Start by removing the boom handle and stow in the boat.

Corsair 880 Sport

Clear the mast in stages

Remove the mainsheet from the end of the boom and stow it carefully in the cockpit without twisting the lines.

Corsair 880 Sport

Clear the mast in stages

For longer distances, remove the mainsheet from the traveler connection and stow it in a cockpit locker ready to use again.

Corsair 880 Sport

Clear the mast in stages

Leave the topping lift attached to support the rear of the boom and slide the front into the cabin.

Disconnect the topping lift to carry it all the way into the front cabin.

Corsair 880 Sport

Clear the mast in stages

Pad the folding seats and secure them to the beam folding struts so they don’t rub and

rattle. Shock cords are great for this, and use the same dedicated travel lines and shock

cords in the same positions every time.

Corsair 880 Sport

Clear the mast in stages

Secure the topping lift to a free mounting point on the base of the mast, begin to secure

ALL halyards to the base and running ends are free from the turning blocks.

Corsair 880 Sport

Clear the mast in stages

Pro-tip: Just coil the lines and stow them in the anchor locker. No need to tie all this

loose line on the mast when transporting.

Clear the mast in stages

Disconnect the downhaul (cunningham) and stow it in the cabin.

Corsair Timaran Sport

Attach the mast raising gin pole

Insert the stainless steel rod in the front of the mast in the stainless socket where the

boom and boom handle used to be attached.

Attach the mast raising gin pole

The gin pole uses two side stays and one stay attached to the mast to help support it.

Corsair 880 Sport

Attach the mast raising gin pole

If the mast support is out of reach you may step on the pole CLOSE to the mast, it will support your weight there to reach up.

Corsair 880 Sport

Attach the mast raising gin pole

Close the hooks, tension the purchase equally and use white tape to secure each hook!! Don’t want them coming loose.

Corsair 880 Sport

Attach the mast raising gin pole

Use white tape at your set point each time to confirm tension.

Corsair 880 Sport

Halyard raising lines

Use the jib and screecher halyards, two for redundancy and bowlines in all three lines as

shown.

Corsair 880 Sport

Halyard raising lines

Tension the trailer winch and the halyards on the mast until the end of the trailer line is

18 inches from the end of the gin pole to ensure knots won’t interfere.

Corsair 880 Sport

Halyard raising lines

Tension the halyards equally and close the clutches. Put the halyards on the horn cleats

too, again for redundant safety.

Corsair 880 Sport

Lowering the mast

Pro Tip: Notice the alignment of the halyards and the gin pole. Are the halyards tracking

straight back? Is the pole straight forward? The halyards MUST land in the gin pole V.

If they are not, just back up a step and confirm why they are not aligned. Wind direction?

Corsair 880 Sport

Lowering the mast

Each Corsair 880 has a bow roller. This one vibrated loose and is missing. Be sure to take

yours off and stow it whenever you are not using it to lower the mast. It’s not designed

as an anchor roller or anything else.

Corsair 880 Sport

Lowering the mast

Communication is key with your partner. Decide based on experience who should help

guide the mast and watch for problems and who should manage the clutch-equipped

winch.

Corsair 880 Sport

Moment of truth

When you are satisfied that all is ready, put a little winch tension on the halyards to

relieve tension on the forestay. Then remove the pin and put it in a safe place.

Corsair 880 Sport

Lowering the mast

Manage the forestay to prevent damage to the aluminum extrusion. It can help to tie a

loose loop around the forestay and secure it to the gin pole. This eases it down to the

horizontal position without scratching the drum or other parts.

Lowering the mast

Guide the furler and drum rearward to avoid scratching the deck. Doesn’t hurt to wrap it in a towel with a bungie for this step.

Corsair 880 Sport

Trick Question

If you made it this far, what did you forget? Is the mast rotation bar connected to the

deck yet? If you forgot this preparation step, put tension back on the halyards

and start again.

Corsair 880 Sport

Deck fittings

Now that we have your full attention, there are three parts. the deck plate, a retaining

bolt and a quick-connect pin that holds the rotation bar to the deck plate.

Corsair 880 Sport

Deck fittings

Slide the base plate into the deck fitting. Wiggle it to be sure nothing is binding.

Corsair 880 Sport

Deck fittings

Next screw the retaining bolt into the base plate but NOT all the way tight. On some

mast rake settings it must hold the base plate securely but NOT cause the pin to bind on

the rotation bar.

Corsair 880 Sport

Mast on the rear support

That step should go smoothly, and the person on the deck can gently guide the mast to

the port or starboard holding the diamond wires to align the mast in the rear support.

Corsair 880 Sport

Secure the bow

You can leave that extra winch line loose if you choose, so you don’t need to wind and

unwind it next time. Just be sure to secure the bow of the boat before anyone moves on

the stern of the boat, and be sure the trailer is secured to a vehicle.

Corsair 880 Sport

Moving the mast forward

On the 880 Sport the mast is long enough that it now has negative pressure when it is all

the way down and pivoted on the deck mount. Don’t pull the pin until you are SURE you

can handle the negative upward push of the mast base. A spotter is a really good idea.

Corsair 880 Sport

Moving the mast forward

Pad the bow pulpit before you place the mast there. use carpeting or even a Yoga Block

to raise the mast higher at the front and lower at the back.

Moving the mast forward

As suggested, use one person’s body weight above the mast to hold it securely, and a

second person can pull the pin and be ready to assist. As soon as it’s rolled forward

about 2 feet the weight goes neutral, and it’s more manageable as you roll it forward

on the dual support rollers.

Corsair 880 Sport

Moving the mast forward

Pro Tip: Last one…the spreaders are WIDE to handle the power of this sail plan. you

most hold the diamond wires firmly as you pull the mast forward. Rotate the mast about

30 degrees so the spreaders can pass through the beams: one low and one high. Be

watchful about hitting the winches with the diamond wires. Just roll it back and forth to

clear any issues.


If you’re interested in knowing more about the new Corsair 880 Sport or Standard or any trimaran… contact Richard Allen / The 180 Marine trimaran expert. richard@180marine.com
Learn more about 180 Marine >>